
3. Visual Studio Code
Visual Studio Code, which used to be called VS Code, is an open source Integrated Development Environment (IDE) produced by Microsoft. An IDE is a bundle of functionality for programming which includes a very capable text editor along a terminal and support for revision control, debuggers for different programming languages and a host of other features. One key advantage of Visual Studio Code is its “Live Share” feature, which enables multiple programmers at different locations to edit the same files collaboratively. This is an immense aid to group work or getting help from the lecturer when you’re not physically in the same room.
3.1. Installing Visual Studio Code on Windows
3.1.1. Direct download
You can also install the current Visual Studio Code release directly from the Microsoft Website. If you are working on a machine where you don’t have administrator access, then don’t try to use the “system” installer (use the “user” installer or the “zip” file). If you do have administrator rights on the machine that you are installing on then any of the options should work.
3.1.2. Software Hub
A slightly older version is available on Software Hub under the name “VS Code”. Follow the instructions on the Imperial Software Hub website. Because this is a slightly older version, and updates come out every month, you will immediately be prompted to update.
3.2. Installing Visual Studio Code on Mac
3.2.1. HomeBrew
If you have installed homebrew then you can install Visual Studio Code by opening a terminal and running this command:
$ brew cask install visual-studio-code
If you install using HomeBrew then the terminal command to launch Visual Studio Code is set up automatically. This means you can launch Visual Studio Code from the terminal with this command:
$ code
3.2.2. Direct download
Follow the official MacOS Visual Studio Code download link. Rather than an installer, this directly downloads the program itself. Open up the Finder (press ⌘ + space and type finder then press enter (⏎)) and copy Visual Studio Code from the Downloads folder to the Applications folder.
If you want to be able to start Visual Studio Code from the Opening a terminal, then you’ll need to do a little more setup from inside the program itself, following the instructions on the Microsoft Visual Studio Code website.
3.3. Installing Visual Studio Code on Linux or Chrome OS 1
Microsoft provide Visual Studio Code packages for a number of Linux distributions. See the Visual Studio Code Linux installation webpage.
In particular, for Debian and Ubuntu based distributions, the easiest way to install Visual Studio Code is to download and install the .deb package (64-bit) from here, and then through the command line in terminal with:
$ sudo dpkg -i <file>.deb
Installing the .deb package will automatically install the apt repository and signing key to enable auto-updating of the software using the system’s package manager.
3.4. Customizing Visual Studio Code
3.4.1. Adding Extensions
There are a number of Visual Studio Code extensions specific to certain programming languages, debuggers, and tools such as a Git repositoy controls support your code development. Please see this webpage and this one (also has a video tutorial) for more information and howto’s.
In particular, you may be interested in the following extensions:
Liveshare (Real-time collaborative coding)
GitLens (Add to the inbuilt Visual Studio Code Git capabilities to seamlessly use Git and control Git repositories within the IDE)
Prettier (To impose consistency in code formatting)
Path Intellisense (Autocomplete directory paths and filenames)
There are scores of other extensions that you might want to try out depending on the programming language or toolset you are using (e.g., LaTeX Workshop).
3.4.2. Sending text to terminal
Most code editors will disable sending text to an (usually, embedded) terminal for security reasons. To enable this behaviour in Visual Studio Code, do the following (its slightly tricky!):
Press control + shift + P in vscode. This will bring up the command “palette” box at the top of the editor.
There, search for “keyboard”, which will bring up a few options. from the list, open Preferences:Open Keyboard Shortcuts File (both are json files).
Place your key bindings in this file to overwrite the defaults (as it says at the top!). Then, add the following to the json file:
{
  "key": "ctrl+enter",
  "command": "workbench.action.terminal.runSelectedText"
}
Note that this is a json file format; so, each keybinding is in a separate pair of { }’s, each keybinding specification then separated by commas.
3.5. Live Share
One of the key advantages of Visual Studio Code is its Live Share extension. Live Share enables two or more programmers to each run Visual Studio Code on their own computers but to see and edit the same files in real time, and to see each other’s cursors as they edit. Live Share can make collaboration much easier, and it also facilitates remote computer lab sessions: the remote equivalent of having an instructor look over your shoulder at the screen is to Live Share your session with them. Live Share takes a lot less bandwidth than sharing your screen and because each participant uses their own IDE, they can independently set factors such as the font size to settings that are legible for them. There is also a Live Share Audio extension that enables you to talk with your collaborators, though you can also use a simultaneous call on another platform such as MS Teams or Zoom.
3.5.1. Installing the Live Share extension
Click on the extensions icon,  , in the left hand bar in Visual Studio
Code. In the search box which appears, type Live Share then enter.
Click on the install button under the Live Share extension. Once the
extension is installed, you should see
, in the left hand bar in Visual Studio
Code. In the search box which appears, type Live Share then enter.
Click on the install button under the Live Share extension. Once the
extension is installed, you should see  at the bottom of your Visual
Studio Code screen.
at the bottom of your Visual
Studio Code screen.
3.5.2. Starting a Live Share
Using Live Share requires that you log in using either a Microsoft or a GitHub
account. If you have neither, then follow these instructions to sign up to
GitHub. Next click on and sign in when prompted.
Once you have signed in, you will see the following:
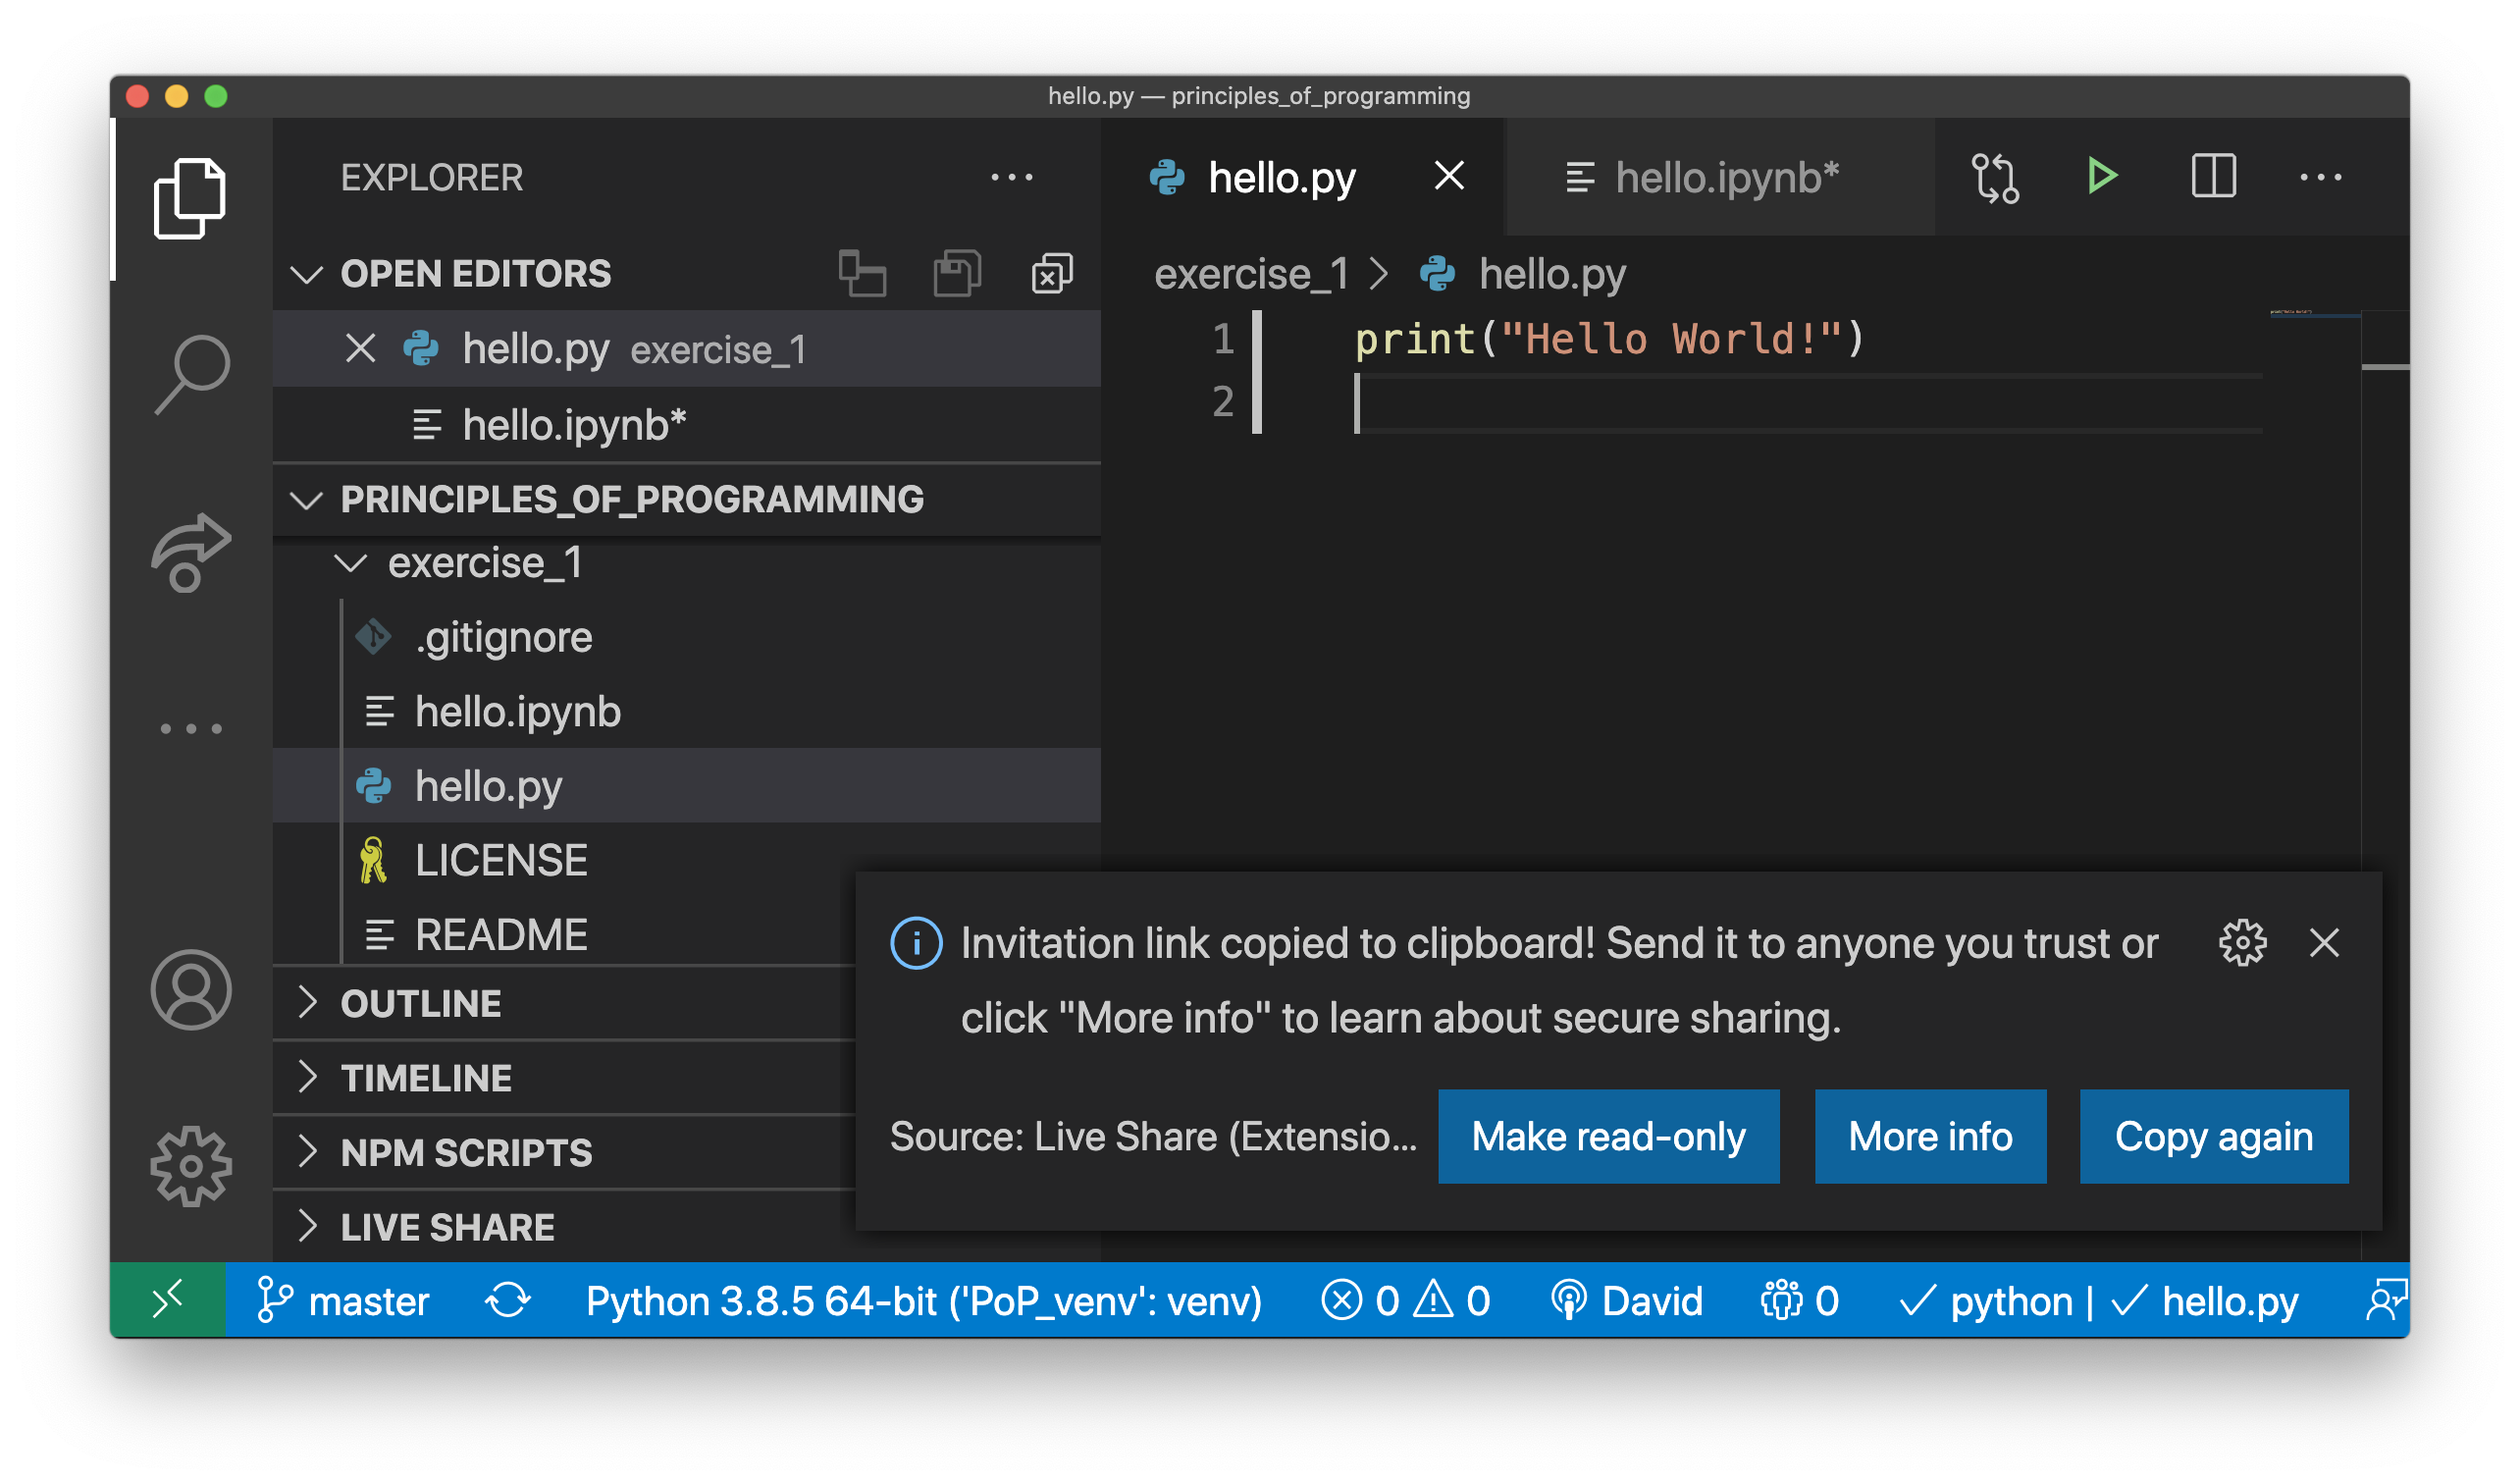
At this stage, the Live Share link has been copied to your clipboard. To invite someone else to join your session, you just need to provide them with this link. For example you could email it to them, or paste it into a chat message. You also have the opportunity at this stage to switch the session to read only, which means that your collaborator will be able to see your session but not edit your files.
3.5.4. Participating in a Live Share
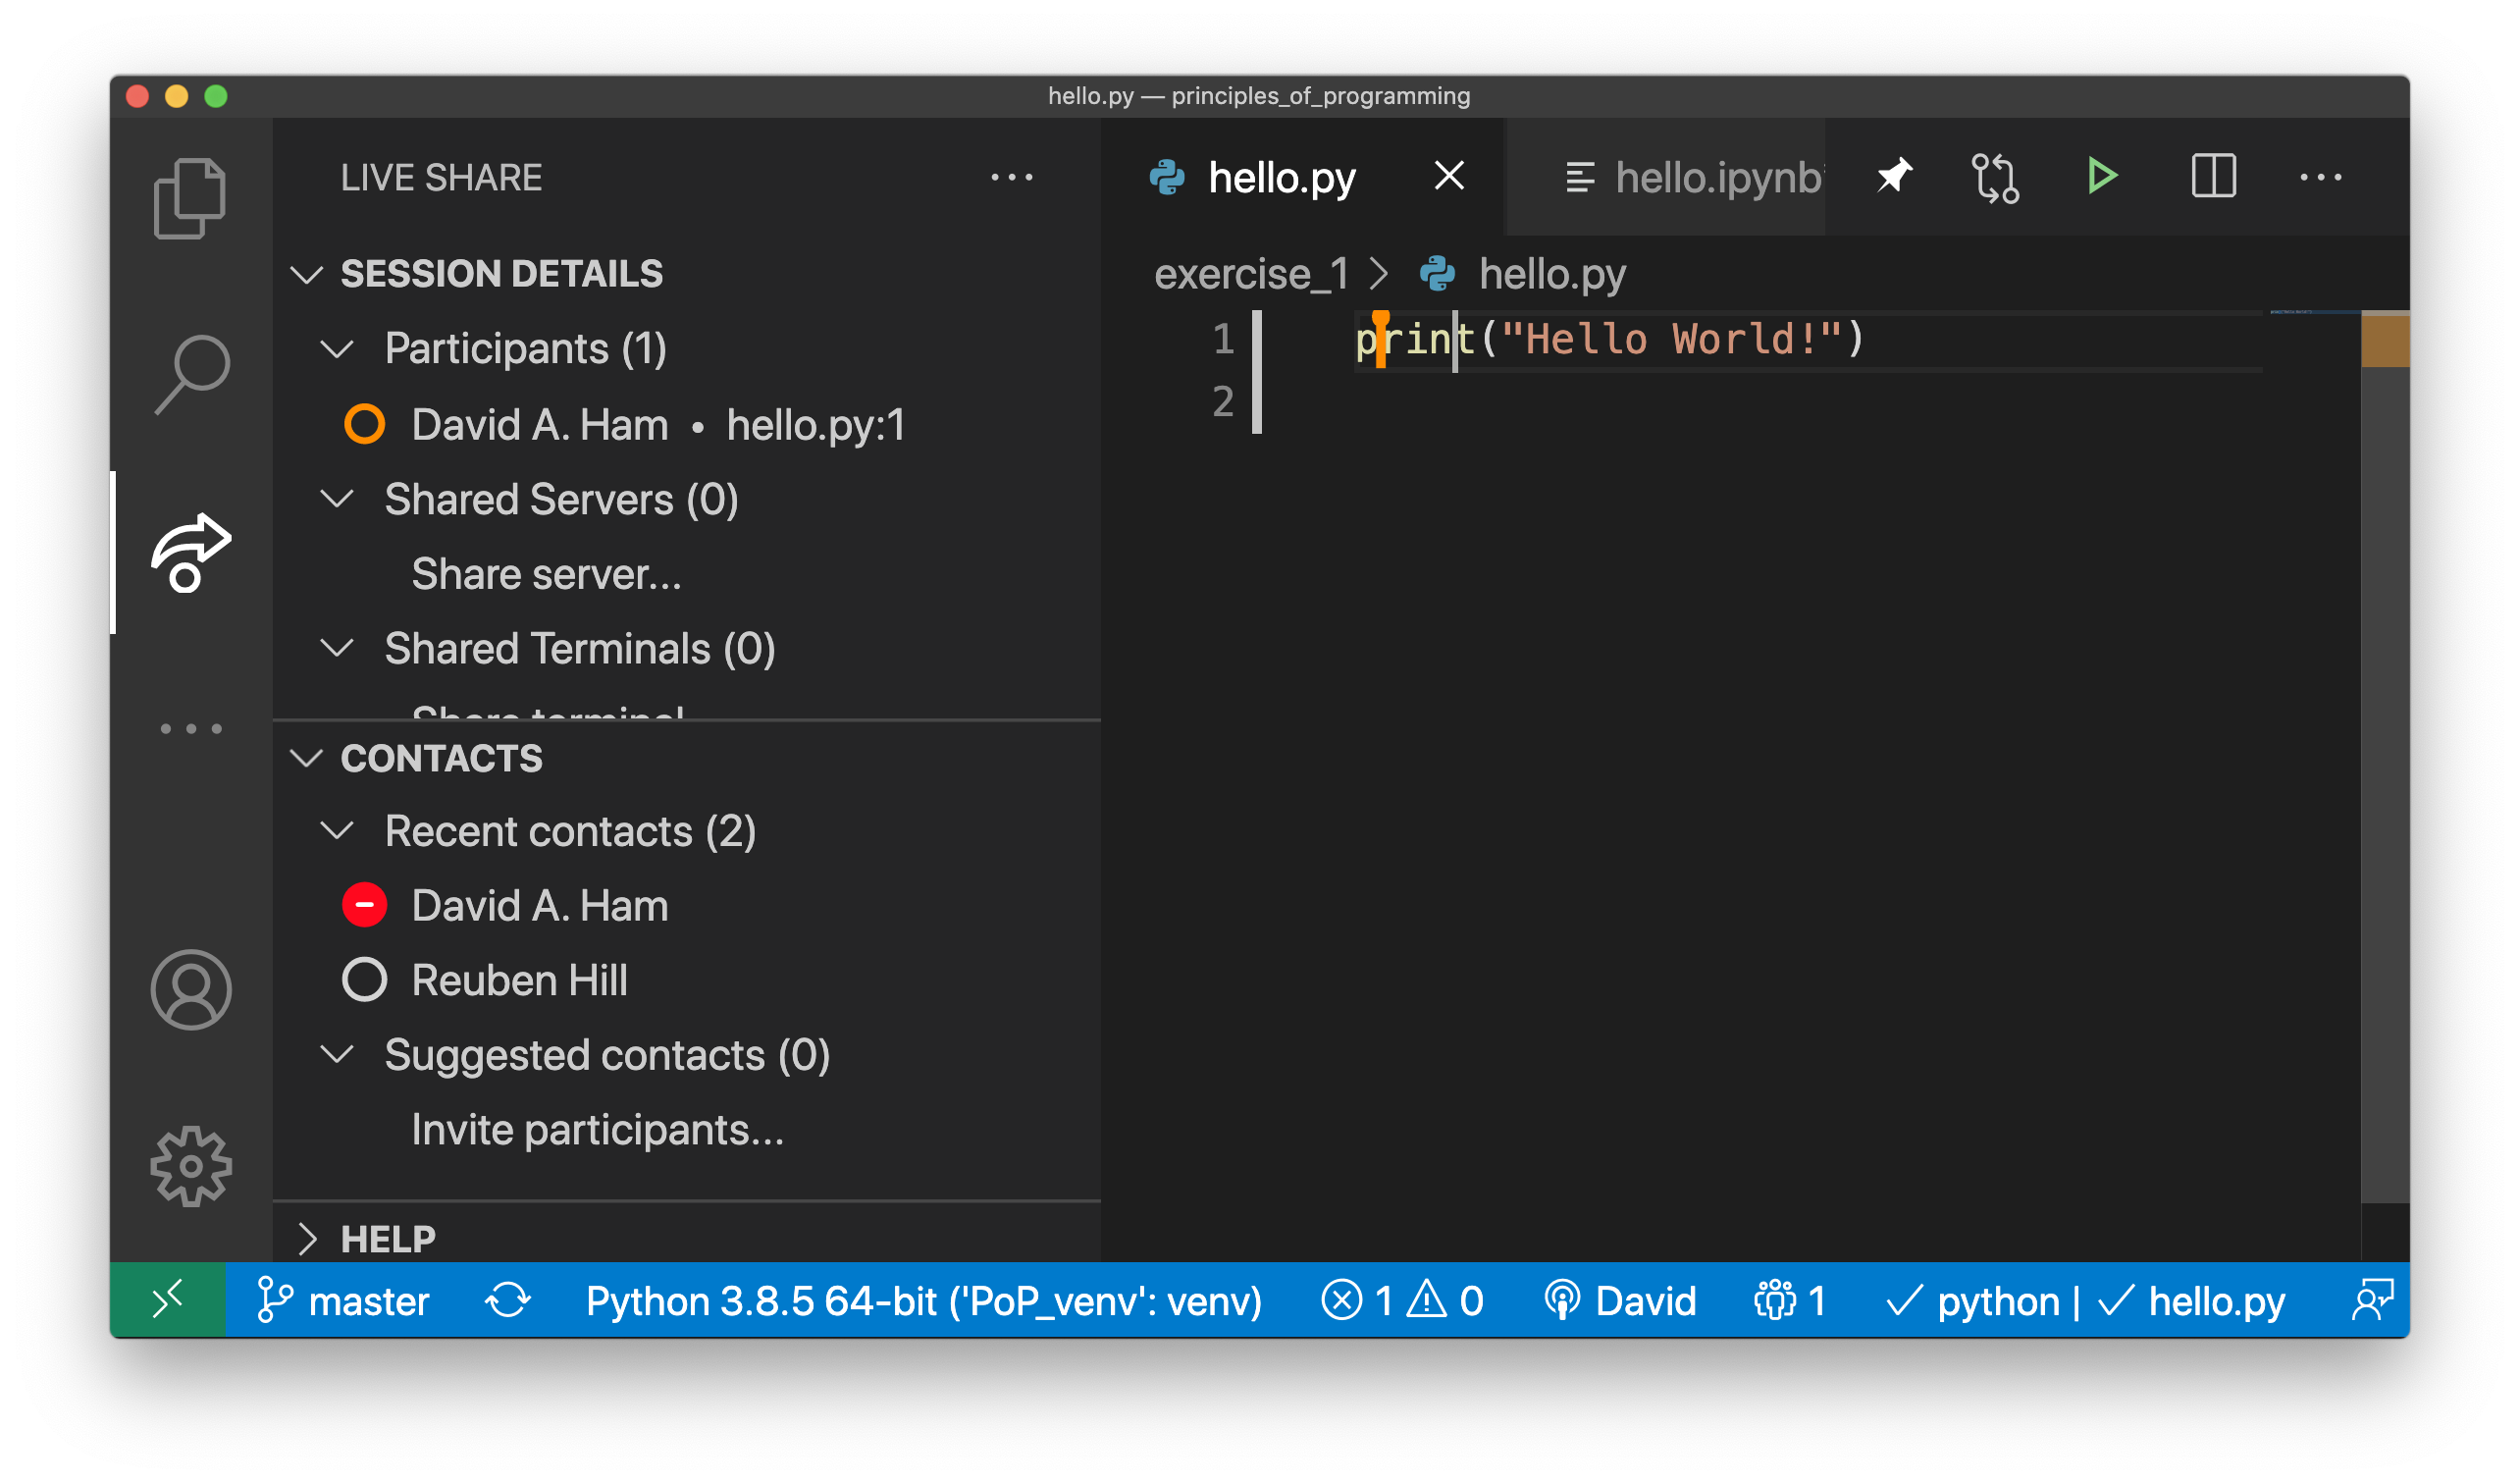
All participants in a Live Share can see all the files in the project, and each others cursors. If there Live Share permits editing (the default), then all participants can also edit the files. The image below shows a Live Share session in progress. The local user’s cursor is visible in grey while the remote participant’s is orange:
The other new image on the screen is the little pin at top right:  . When
this pin is selected, it turns green and indicates that this user is following
the other participant. This means that as the other participant navigates from
around the file or changes files, the display will jump around to follow them.
If there are multiple participants, then you will be asked which participant to
follow.
. When
this pin is selected, it turns green and indicates that this user is following
the other participant. This means that as the other participant navigates from
around the file or changes files, the display will jump around to follow them.
If there are multiple participants, then you will be asked which participant to
follow.
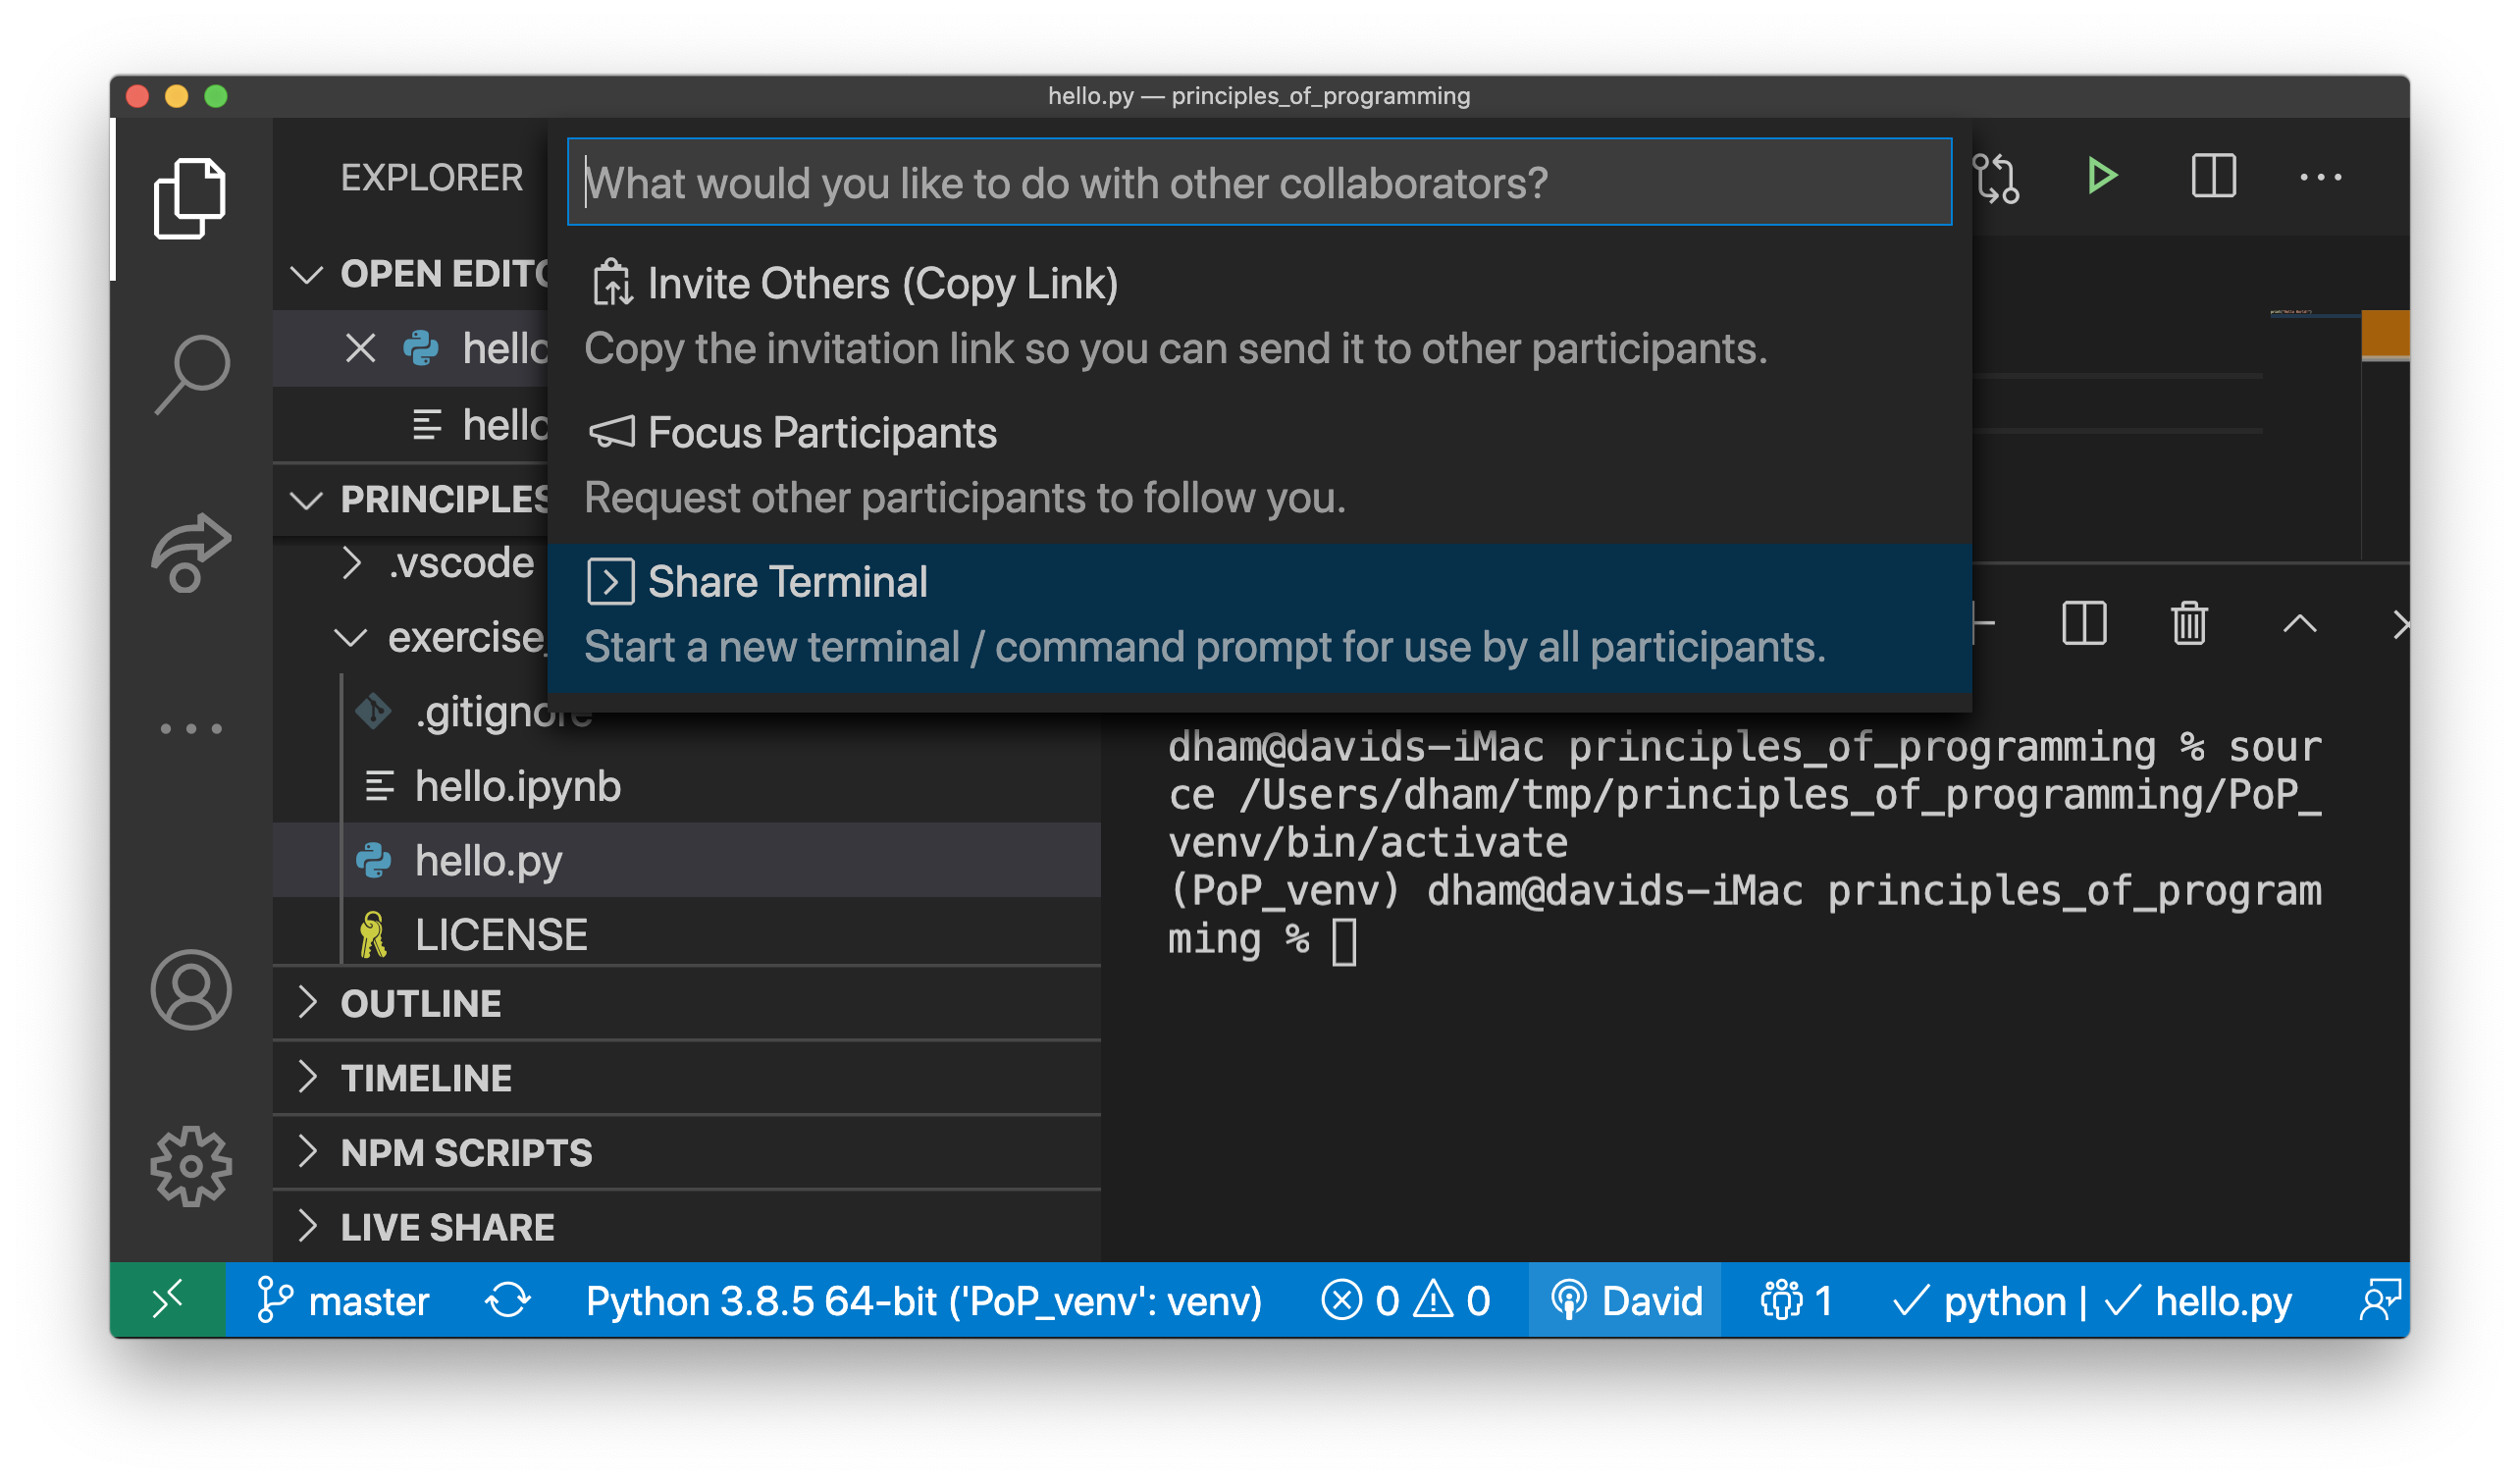
3.5.5. Sharing a terminal
By default, any terminals that you have running from within Visual Studio code will not be shared. However, you can launch a shared terminal that your collaborators can see and (if you allow it) type in. Click on your name at the bottom of the Visual Studio Terminal and choose Share Terminal:
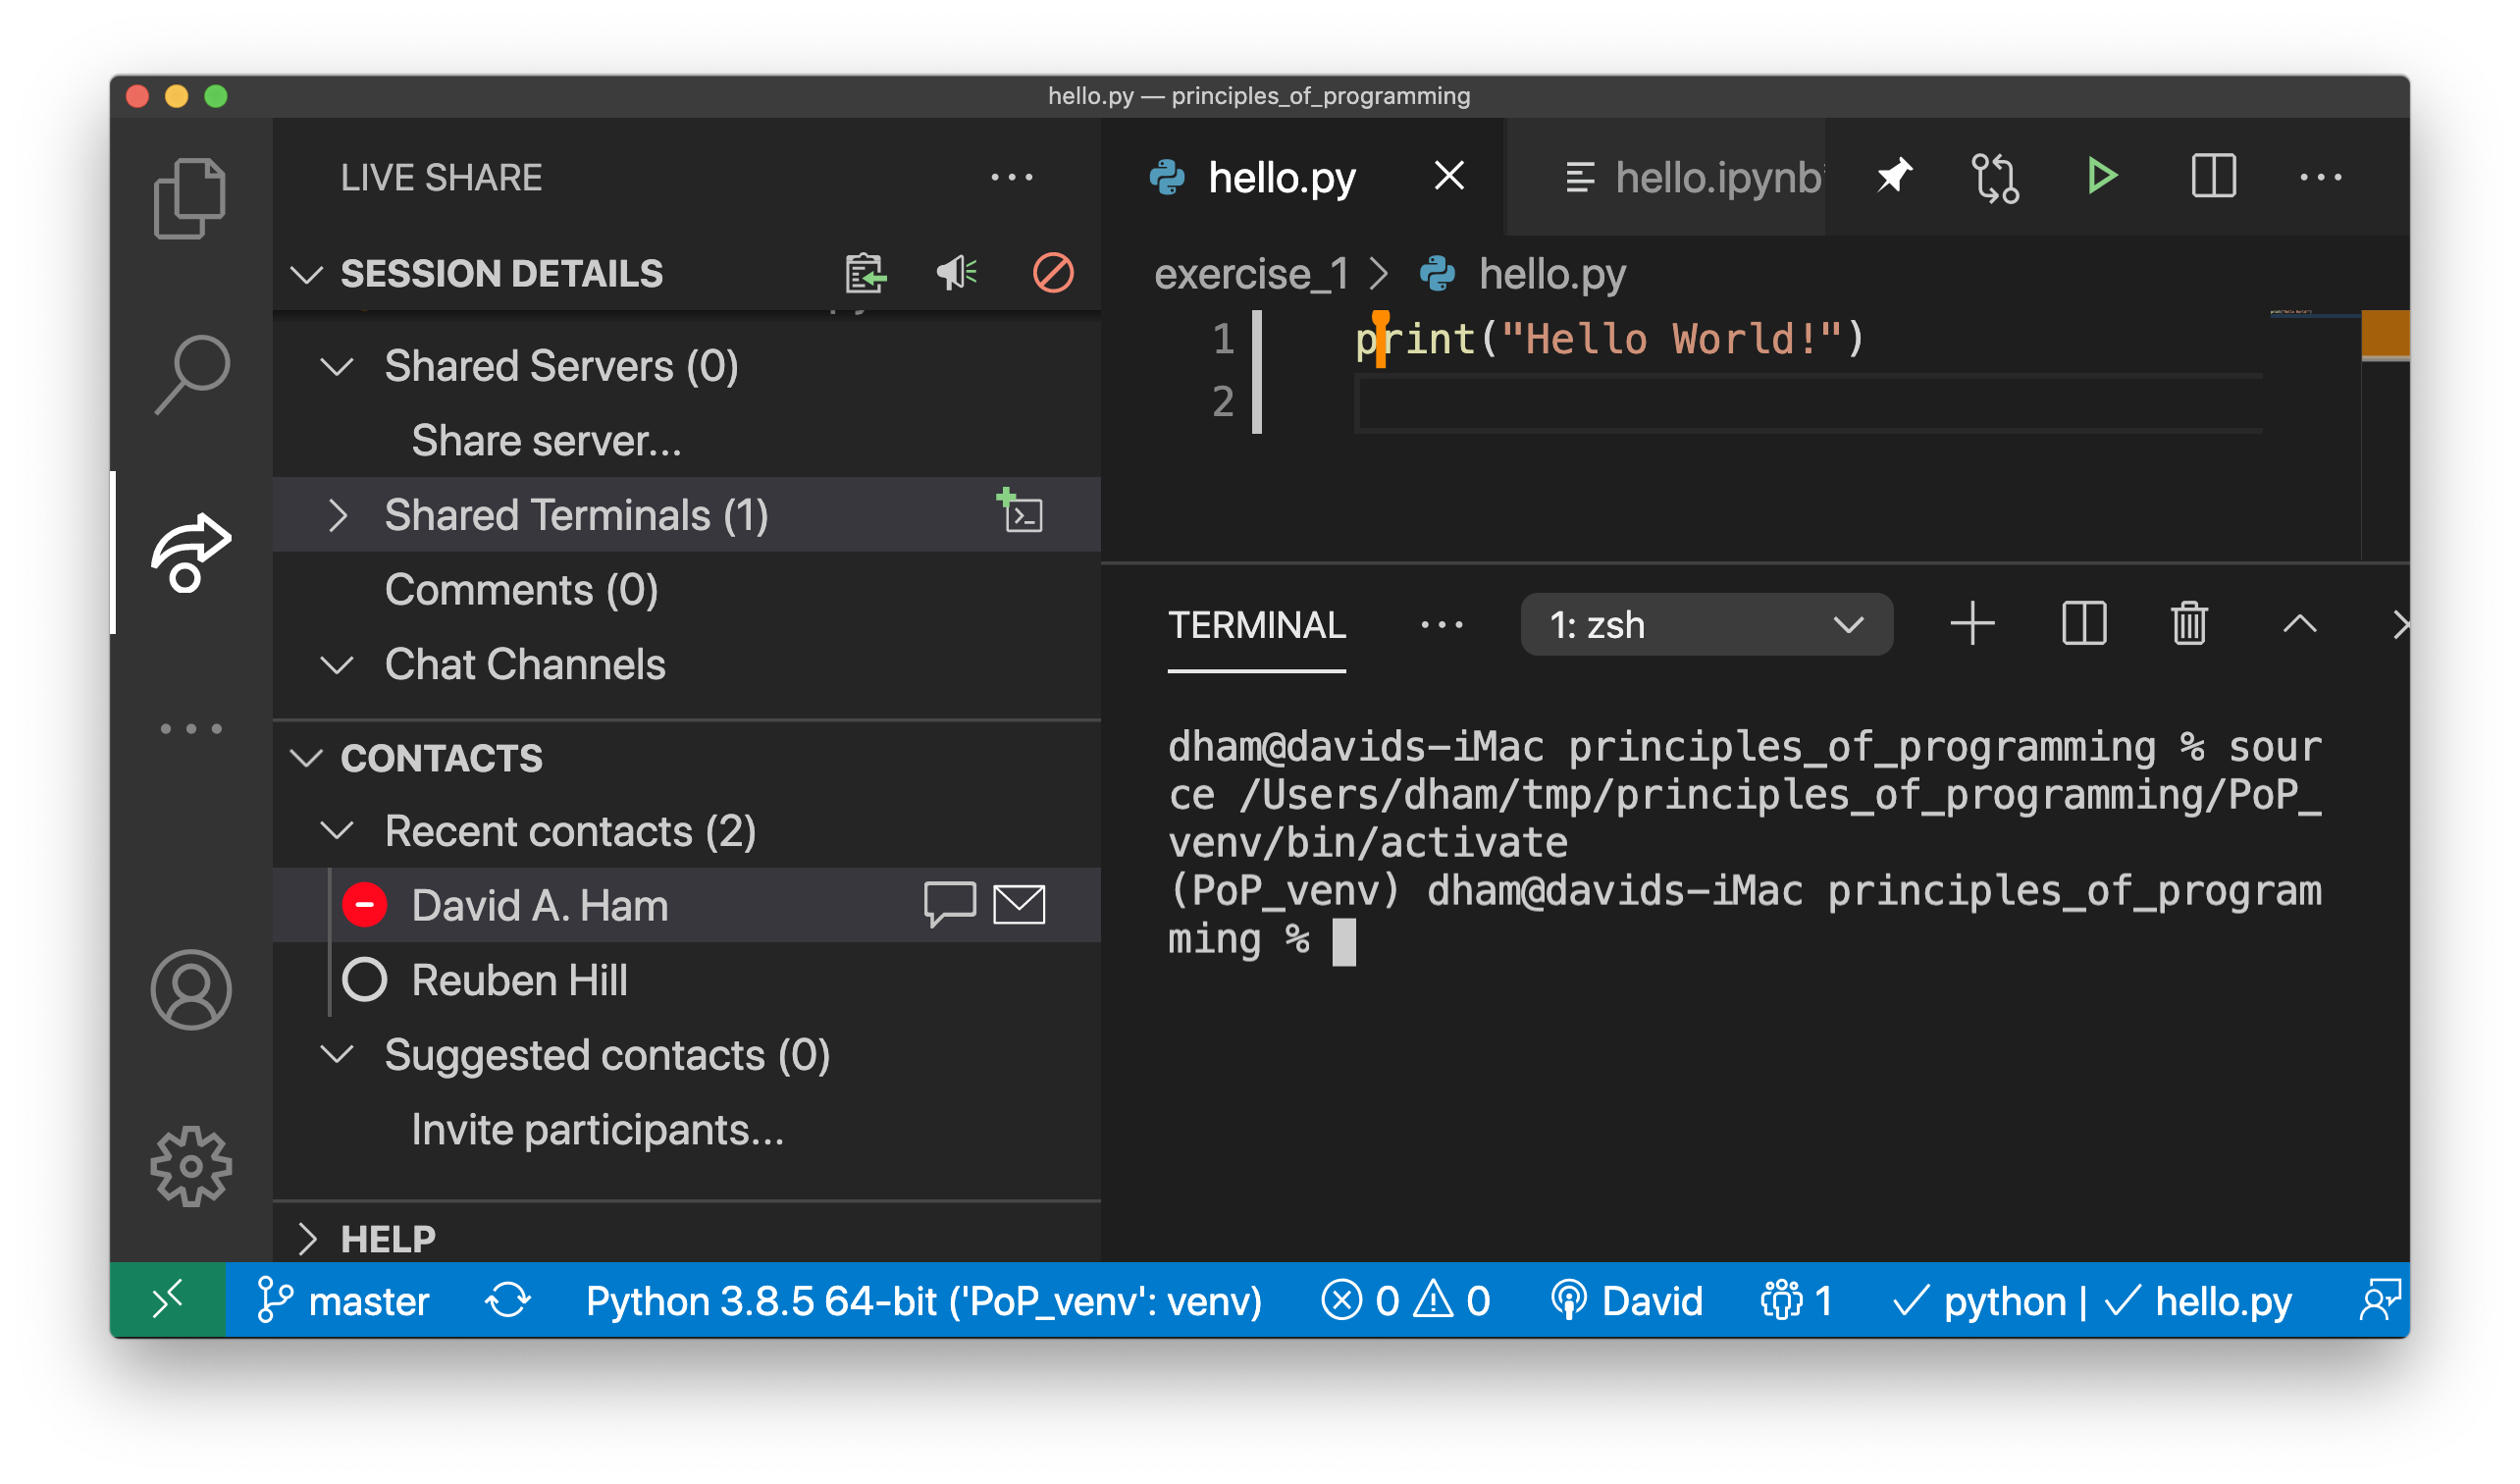
On the next page you can choose whether the other participants should be able to type into the terminal (read/write) or should only be able to watch your work.
3.5.6. Ending the Live Share session
If you are the host of a Live Share, then you can end the session by clicking on
the Live Share icon on the left, ![]() , and then selecting the stop
icon,
, and then selecting the stop
icon,  , which appears when you hover your mouse over the
SESSION DETAILS bar:
, which appears when you hover your mouse over the
SESSION DETAILS bar:
If you are another participant in a live share, just close the Visual Studio Code window for the Live Share session.